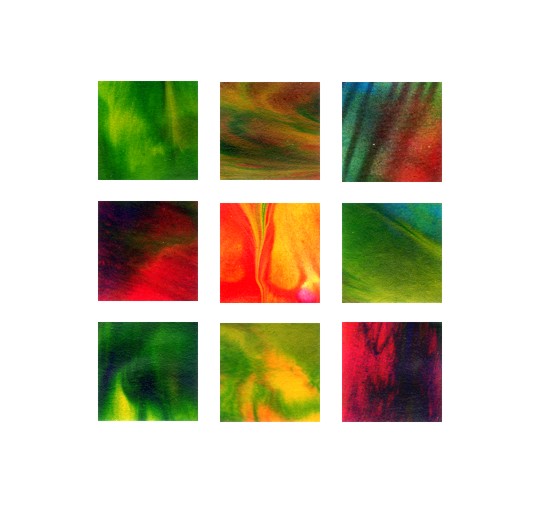
This is an updated version of a previous exploration. I’ve updated it and reposted it here for today’s workshop participants and anyone else who might be interested. A new exploration on paper mosaics will follow shortly 😀
Do you remember those fun paintings we did as a kid in school – blob some paint on a piece of paper then fold it over, rub, and open it up to see some pretty butterfly shaped random composition? Well, these are what I’m calling butterfly paintings. I used to love them as a kid and I’m loving playing with them now.
Why? Because they produce some stunning colour combinations, swirls of paint, caught at the moment of not quite blended. So now I’m an adult and get to play with some real nice paint and media, I’ve been returning to my youth and playing with these paintings to see what I can create and what I can do with my creations.
What you might need
- fluid acrylic paint (thin paint is best, but if you only have thicker paint, it can work)
- self-leveling gel (I use Golden or Matisse)
- cartridge paper (at least 150gsm as lighter papers go soggy and tear)
- daggy clothing and furniture protection
What you might do
Fold your piece of paper in half, press the fold firmly and then unfold flat.
If you are using self-leveling gel, use a syringe/eyedropper/squirt bottle to distribute some gel randomly across the paper. Make sure you put down a decent amount as the gel is the vehicle for the paint to swirl and blend in.
Start dripping paint on the gel. Choose several colours that work well together. Add more of the lighter colours than the dark as the lighter colours like yellow or white are great for creating spontaneous combinations when the colours are mixed, but can be overpowered by darker colours if there isn’t enough.
When you are happy with the paint distribution, gently re-fold the paper in half again, bringing the two wet paint sides together. Press down on the paper forcing the paint between to move and blend. Experiment with pressure and how much you apply to get different results. I find less is better than more. Too much can create too much blending and you lose those wonderful swirls if you are not careful. Also be aware that paint may squish out the sides and get all over your fingers and work surface. If you are concerned about getting paint on your hands, wear gloves.
Gently open the sheet of paper to reveal your painting.
And here is one of my basic videos to demonstrate.
Liz’s notes
 Do not leave closed too long as acrylics can dry fast. If left too long the two sides of the page will glue together and tear upon opening.
The self-leveling gel is not mandatory, but it does make a lovely addition as it encourages the colours to swirl and marble.
Experiment with different folds, quantities of paint, colours, how you move the paint around when rubbing, there are a multitude of different things that can be done to give a different result. I have only scratched the surface myself.
And then there is what you do with the painting afterwards. Sure they make interesting compositions, but I think the strength of these paintings really show when you cut them up. I’ve used them for paper mosaic tiles, one centimetre paintings, mixed media paintings and even jewellery. I just love the texture and colours that spontaneously form using this technique. I once cut a small square out of a butterfly painting and then recreated the colours on that square at a larger size using oil pastel and made an entirely separate painting. A simple yet complex source of inspiration.
Gallery
This is the painting I created in the video. And below are some close up shots.

A similar butterfly painting, but with the addition of white created these:
And these are some of the uses I’ve been playing with.
 One centimetre paintings – these were done with cheap paints and no gel. I think if I created these again with high quality paints and gel, the outcome would be even more interesting.
In Motion I just played around with chopped up pieces of butterfly painting and this composition happened. Every tile on it, including the circles, is from butterfly paintings (my earlier ones done with cheap paint and no gel).
I have a pile of ideas I’m hoping to play with in the future, but they all branch out from this basic concept.
I hope you’ve found this as interesting as I have found it fun to explore.
For more on my paper mosaic explorations click here 😀
For my other Explorations click here !
Best wishes,
Liz


Comments
3 responses to “Exploring butterfly paintings”
[…] Paper – can be plain coloured or decorated (be wary of commercially printed papers and copyright issues if you intend to sell your final piece). I especially like to use my own created papers using the Butterfly Painting technique. […]
[…] insomnia last night so crawled into my studio at 3am and did a bunch of butterfly paintings in preparation for some more paper mosaics. As you can see above, I went a little […]
Remembering the childhood memories. I have tried this with cheap craft paint on fabric, without gel.I wonder if hand sanitizer would work instead of the acrylic gel.I am not sure if i can find this gel here in Turkey.